To grow your social media presence as a metal musician you need to write, record and mix a lot of music and post it consistently. In this post we’ll discuss the tools you need to achieve that with minimal effort, including virtual drums, virtual bass, as well as free guitar and bass plugins. We’ll also offer you some suggestions on how to start writing a metal riff when you have zero ideas.
Be sure to watch the video version of this post to actually hear what it all sounds like: https://youtu.be/gGS4HuHj9wM. Let’s go!
Using ready MIDI-grooves is a great way to start writing when you’re completely out of ideas. Fame & Fury MIDI-groove pack for Hertz Drums has a whole bunch of great modern metal grooves to play off of (Picture 1).
For this piece I picked a slow MIDI-groove with a nice kick pattern, and just played the same pattern with palm mutes on the lowest open string on my guitar. Then I added some hammer-ons and pull-offs higher up the neck to add some variation.
As a general rule, when you’re struggling to write the next section of your song, try to make it the opposite of the previous section in one way or another. Like here, the first section is very technical, chuggy, and intense, so it makes sense to build the next sections around long open chords and a simpler drum pattern to give the listener some room to breathe.
Finally, I added a bunch of drum fills to stitch the sections together, and completed the piece with a short drum intro, all available in the Fame & Fury MIDI Pack.
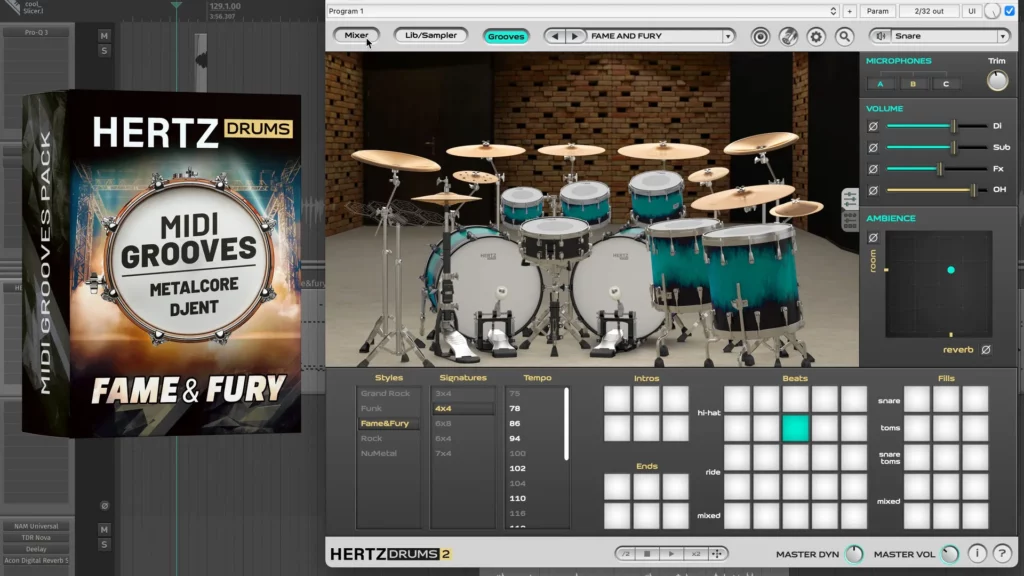

Picture 1 – Fame & Fury Groove Pack for Hertz Drums 2
For the drum tones we’re using the preset Activate You from the Fame & Fury virtual drum set for the Hertz Drums plugin, with some minor adjustments to the kick and snare balance (Picture 2).
The crucial thing here is to check the tuning of your snare and kick. My song is in the key of C, so I made sure my kick is tuned to the C note, and my snare is tuned to the G note, which are both in the key of C. To do that, use an EQ with an analyzer that can show notes on the Drum Channel, and check at what notes the bumps on the frequency curve build up whenever the kick and the snare are playing (Picture 3). Then use the Tuning slider in Hertz Drums to move those bumps to the desired notes.
The Fame & Fury virtual drum set is mix-ready, so we’re just using the stereo output of Hertz Drums without multichannel output routing, to have all our drums on one channel. On the drum channel we’re adding a bit of bus compression using the free TDR Kotelnikov compressor. (Picture 4) Slow attack, medium release and 3:1 ratio for some mild glue on the drums (about 2 dB of gain reduction on snare hits). And that’s it. It didn’t sound like these drums needed any more processing.
Fame & Fury Sample Pack: https://hertzinstruments.com/packs/hertz-drums-fameandfury-pack/
TDR Kotelnikov: https://www.tokyodawn.net/tdr-kotelnikov/
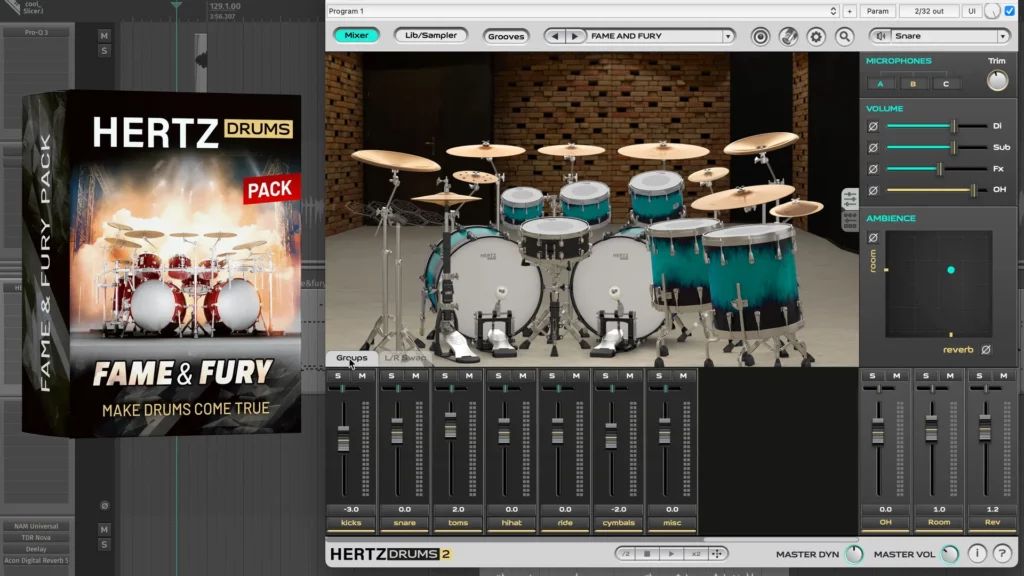

Picture 2 – Fame & Fury Sample Pack for Hertz Drums
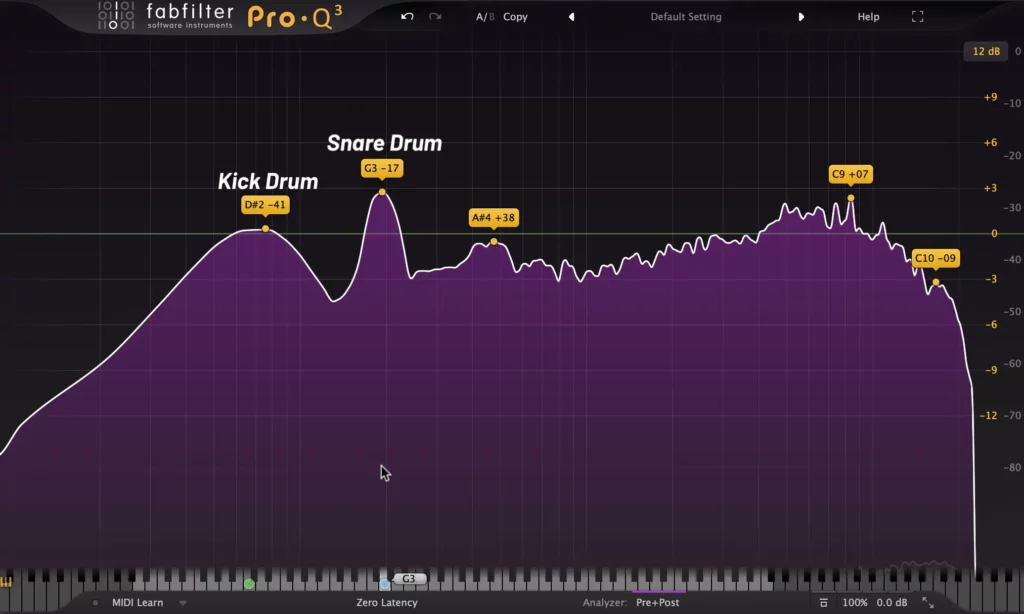

Picture 3 – Checking the snare and kick tuning
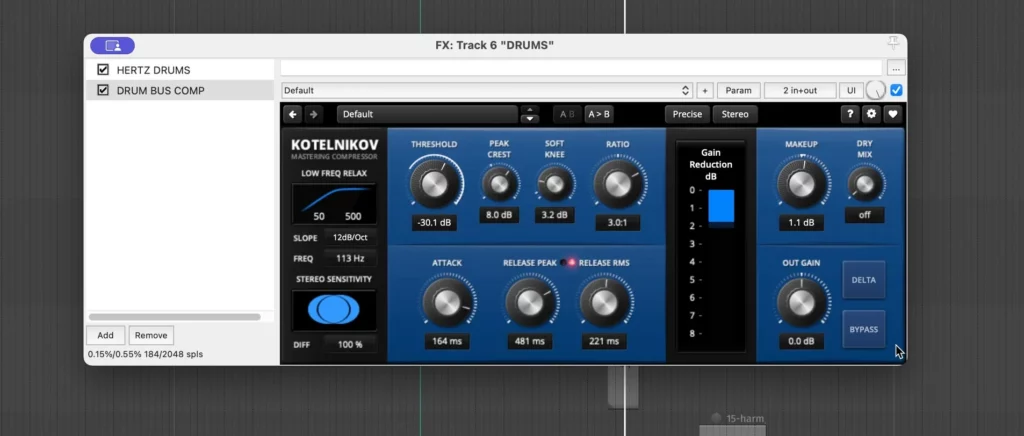

Picture 4 – Drum Bus compression. TDR Kotelnikov
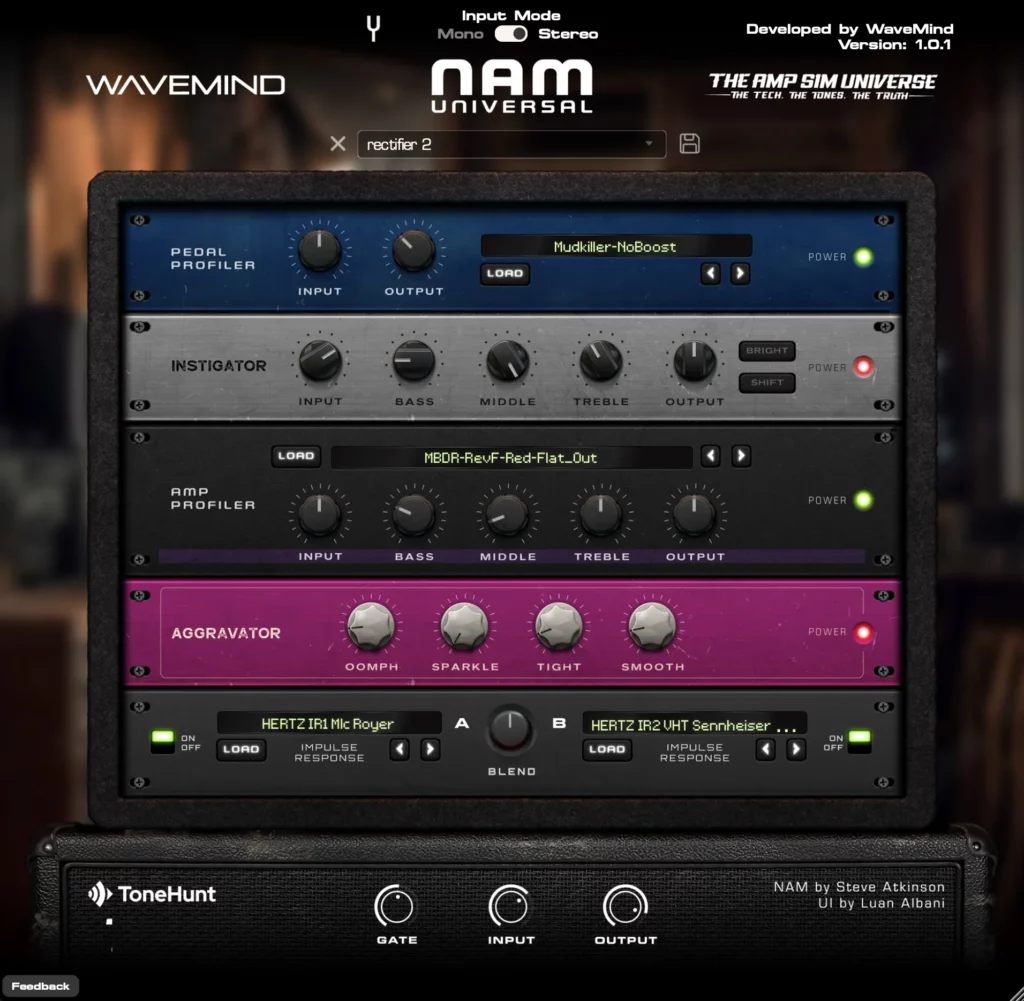
I recorded two rhythm guitar tracks and panned them hard left and hard right. I’m sending them to the free NAM Universal guitar amp plugin by Wavemind that is based around the Neural Amp Modeler.
At https://tonehunt.org you’ll find hundreds of free amp and pedal captures for this plugin. (Picture 5)
In the IR loader module of the plugin we’re using two impulse responses from the Perfect Match IR pack by Hertz Instruments. You can download the amp and pedal captures and the two IRs for free here: https://bit.ly/fame_and_fury
After the amp we’re adding the free TDR Nova dynamic EQ. We’re setting the threshold so that it only reacts to the palm mutes and applies about 2 dB of gain reduction to the lower-mid range of my guitar track, preventing the mud build-up in that region. (Picture 6)
To make the guitars wider, we’ve bounced the stereo guitar track with all of the FX so far, droped it into the project and duplicated the track, to have the full guitar track on two separate tracks in the DAW.
On the first track, we’re cutting everything BELOW 450 Hz and making it wider using the free DMG Audio Track Control Plugin (the Width around 150% works well).
On the second track we’re cutting everything ABOVE 450 Hz and using Track Control’s width parameter to make it more narrow (around 50%). Be sure to adjust the output gain in Track Control to keep the tracks at the same volume as they were before the plugin. (Picture 7)
Finally, we’re sending these two tracks to the Rhythm Guitar Bus and cutting some of the hi-mid range harshness with an EQ. (Picture 8)
NAM Universal by Wavemind: https://wavemind.net/software
TDR Nova dynamic EQ: https://www.tokyodawn.net/tdr-nova/
DMG Audio Track Control: https://dmgaudio.com/products_trackcontrol.php

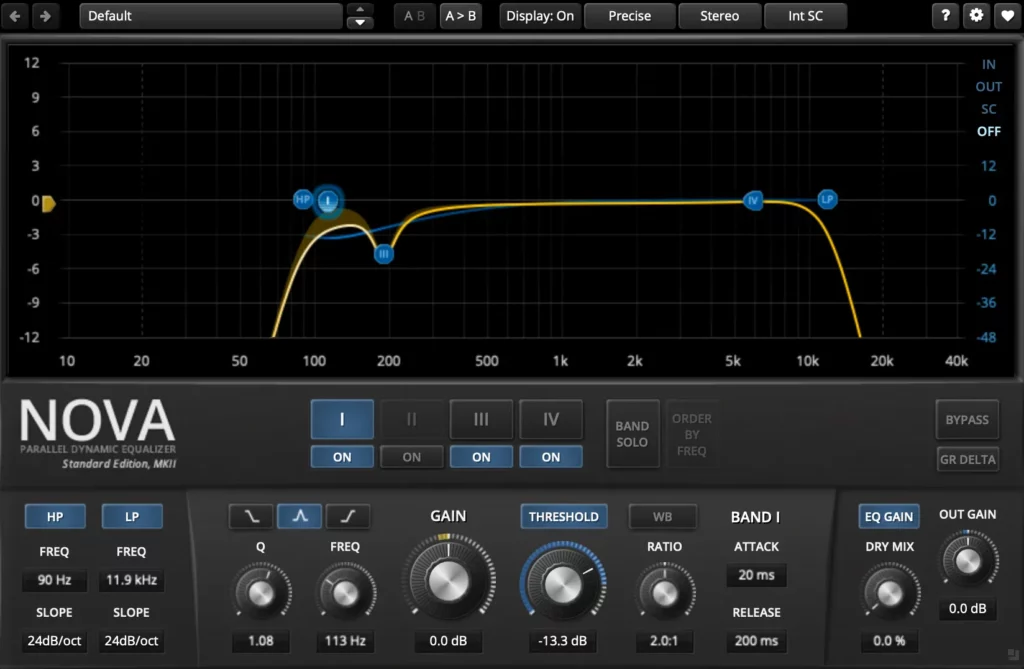

Picture 6 – Rhythm Guitar EQ. TDR Nova
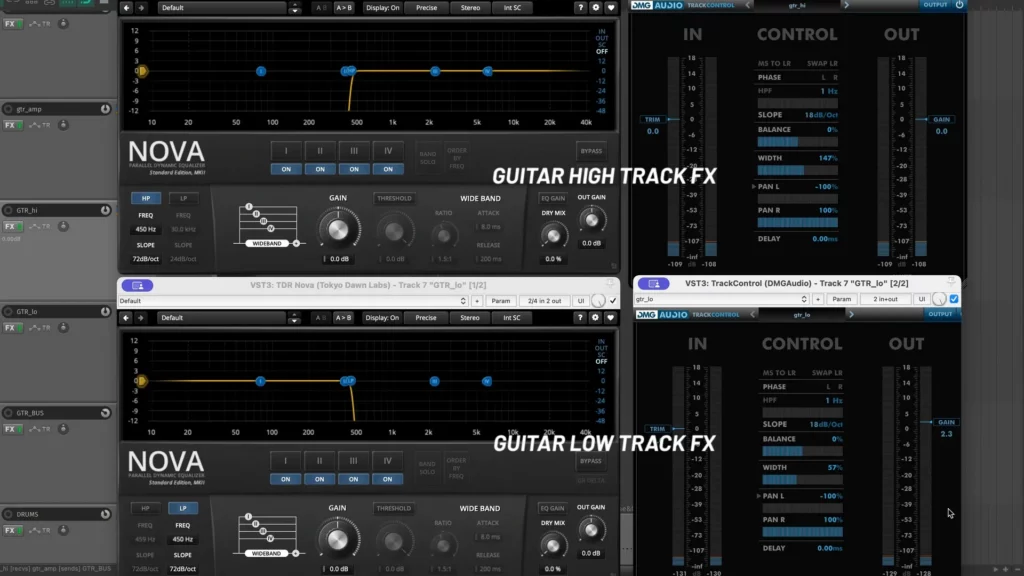

Picture 7 – Widening the guitars with DMG Audio Track Control
In this project we’re using the Shreddage 3 Precision Free MIDI-bass library for Kontakt by Impact Soundworks. (Picture 9).
Rhythmically, the bass part mostly repeats the kick and snare pattern of the drum track.
We’re splitting the bass track into two tracks – Bass Low and Bass Hi.
On the Bass Low track we’re cutting everything below 40 Hz and above 160 Hz to only isolate the fundamental low-end part of the track. We’re limiting it hard with the free Loudmax limiter to acheive complete consistency in the low end (about 9 dB of gain reduction). (Picture 10)
On the Bass High track we’re cutting everything below 560 Hz and using a Sansamp model in the NAM Universal to get that gritty clunky bass tone (download the amp model Here). (Picture 11)
Both bass tracks are then sent to the Bass Bus.
Shreddage 3 Precision Free MIDI-bass library for Kontakt by Impact Soundworks: https://impactsoundworks.com/product/shreddage-3-precision-free-kp/
Loudmax Limiter: https://loudmax.blogspot.com
Amp and Pedal for NAM Universal: https://bit.ly/fame_and_fury
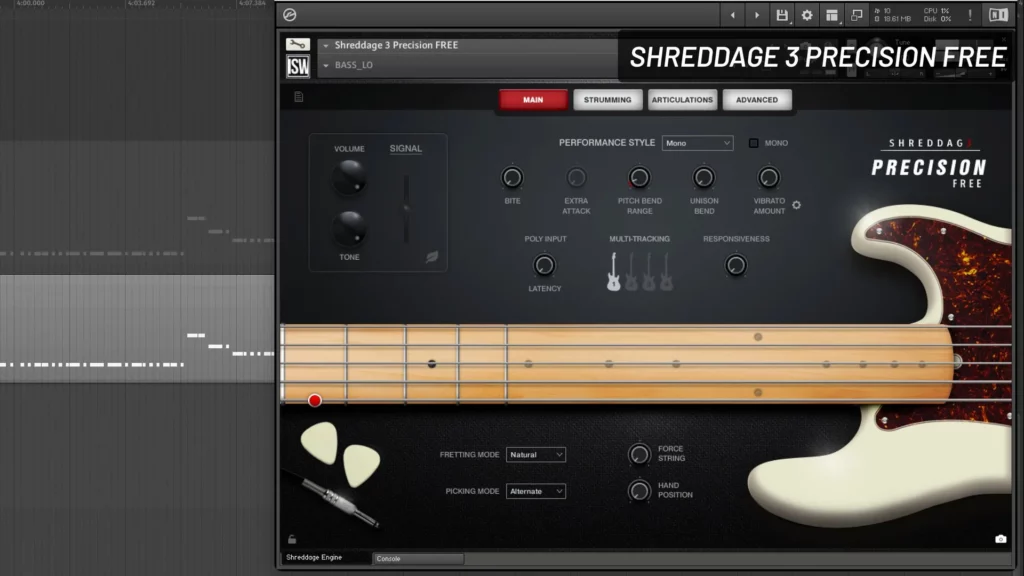

Picture 9 – Bass MIDI-library. Shreddage 3 Precision
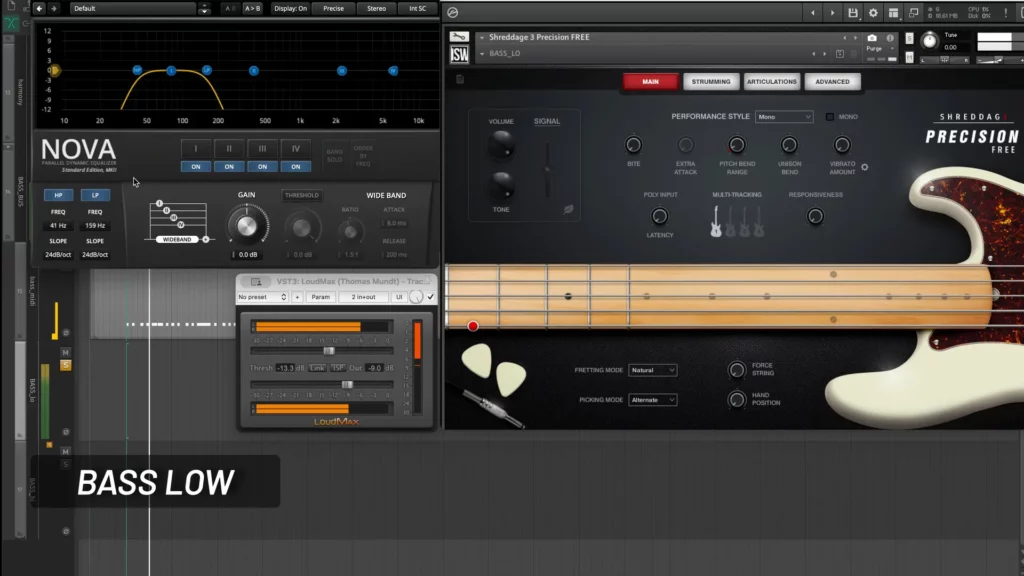

Picture 10 – Bass Low Track
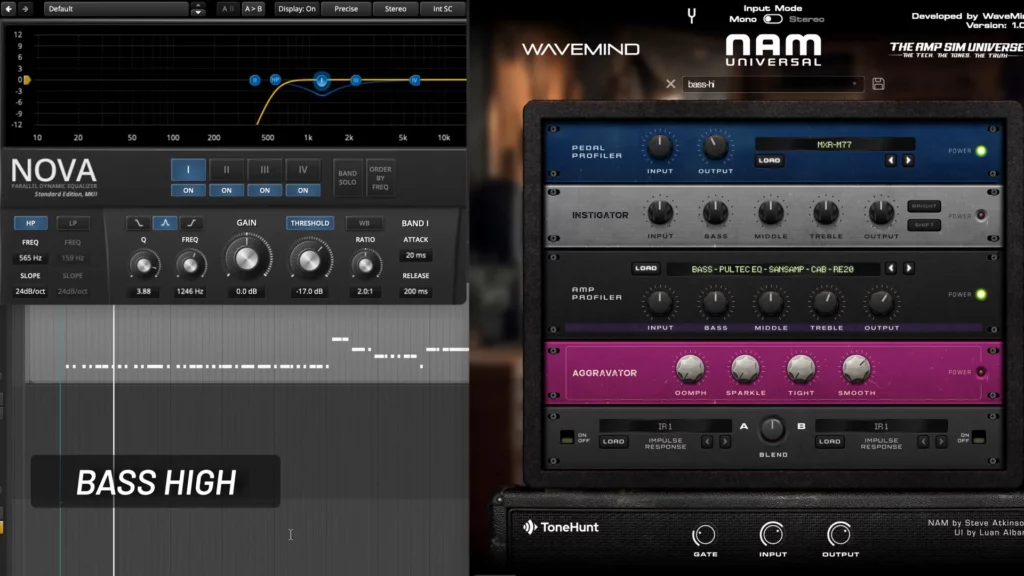

Picture 11 – Bass High Tracks
For the leads we’re using an EVH model for the NAM Universal plugin with one of the Perfect Match IRs again. We’re then cutting some of the hi and hi-mid range with an EQ to make it smoother, and adding the free Deelay by Sixth Sample and Reverb Solo by Acon Digital to give the leads some ambience. (Picture 12)
To make sure the leads always cut through the rhythm guitars we’re using the free TDR Molotok compressor on the Rhythm Bus. We’re using the External Side chain function and sending the Lead Guitar track to the side-chain input of the plugin. This way the compressor listens to the Lead Guitar and automatically pushes down the Rhythm Guitar volume by around 1 dB whenever the leads start playing. (Picture 13)
Reverb Solo by Acon Digital: https://reverb.com/software/effects/acon-digital/47-reverb-solo
Deelay by Sixth Sample: https://sixthsample.com/deelay/
TDR Molotok compressor: https://www.tokyodawn.net/tdr-molotok/
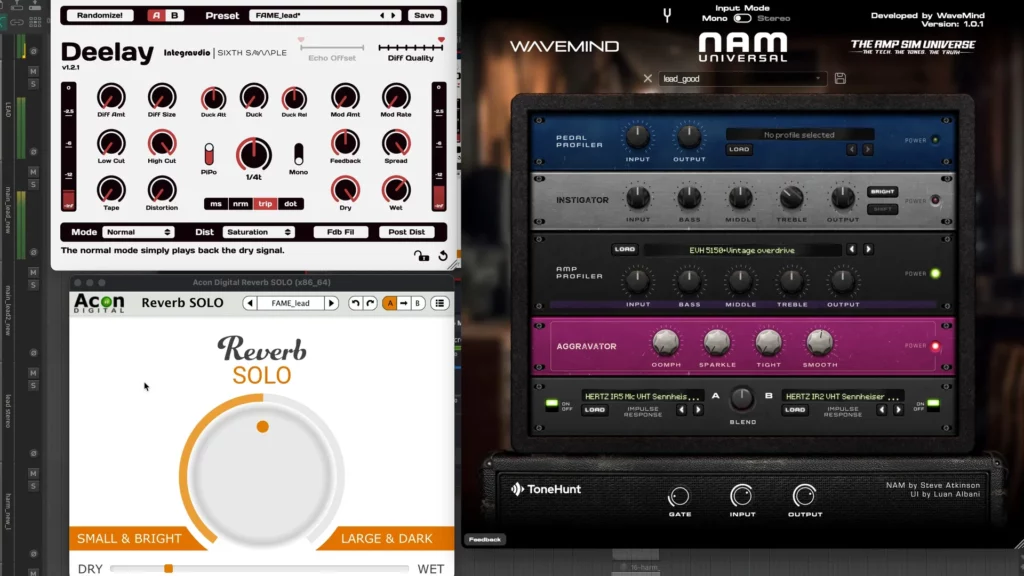

Picture 12 – Lead Guitar Tone
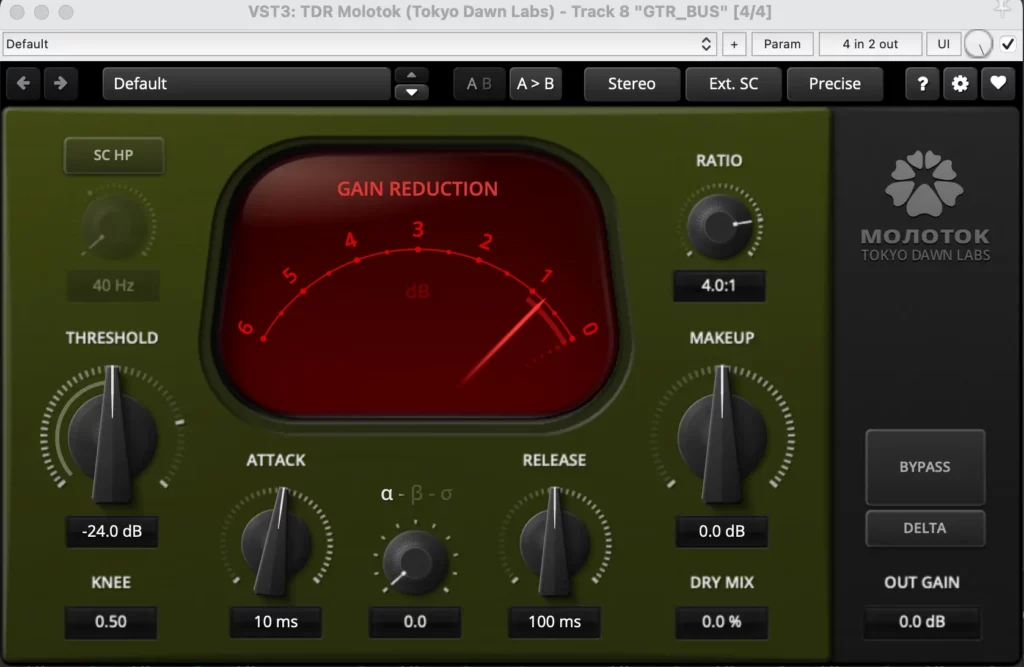

Picture 13 – Rhythm Guitar side-chain compression
To set up the final loudness we’re using the free Loudmax Limiter and Youlean Loudness Meter plugins. Play the loudest part of the track and slowly slide the threshold control down until you see around -9 to -8 LUFS Integrated on the Loudness Meter. (Picture 14)
Always listen to how it sounds! Don’t just look at the numbers. If you start hearing the pumping effect and/or strange loudness variations (like shown in the video), you might want to pull the threshold back up a little bit and make your track quieter.
After you’ve set the desired loudness, listen to the full mix again and make final balance adjustments. Limiting might change the perceived instrument balance in the track, some elements that were quiet in the mix might suddenly jump out. Listen to your track before and after final limiting at the same volume and make sure it is not sounding drastically different balance-wise when final limiting is applied.
Youlean Loudness Meter: https://youlean.co/youlean-loudness-meter/
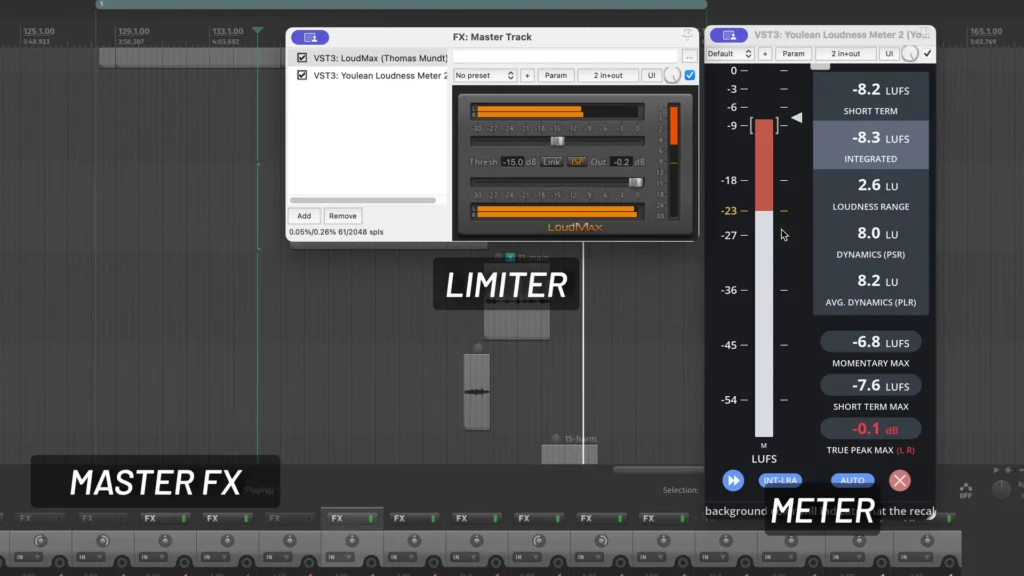

Picture 14 – Final Limiting
When creating music for Instagram Reels, YouTube Shorts, or other platforms, knowing How To Write and Mix Music for Social Media FAST is key to standing out. Use mix-ready virtual drums like Hertz Drums 2 and explore the Fame & Fury library, which contains everything you need to compose powerful metal tracks tailored to your needs. With these tools, you can achieve professional tones quickly, focus on writing memorable riffs, and strike the perfect balance between instruments. Mastering How To Write and Mix Music for Social Media FAST ensures your mix is clean, efficient, and ready to captivate your audience.
Some of the manufacturers require you to register on their website to download these free plugins.
Vitaliy Yakovlev, Sarvastivada
Subscribe to our newsletter to stay updated with the latest news from Hertz Instruments and enjoy a 10% discount on all products!