In this section you will find several tips and recommendations you might want to follow to seamlessly connect your electronic drums to Hertz Drums.
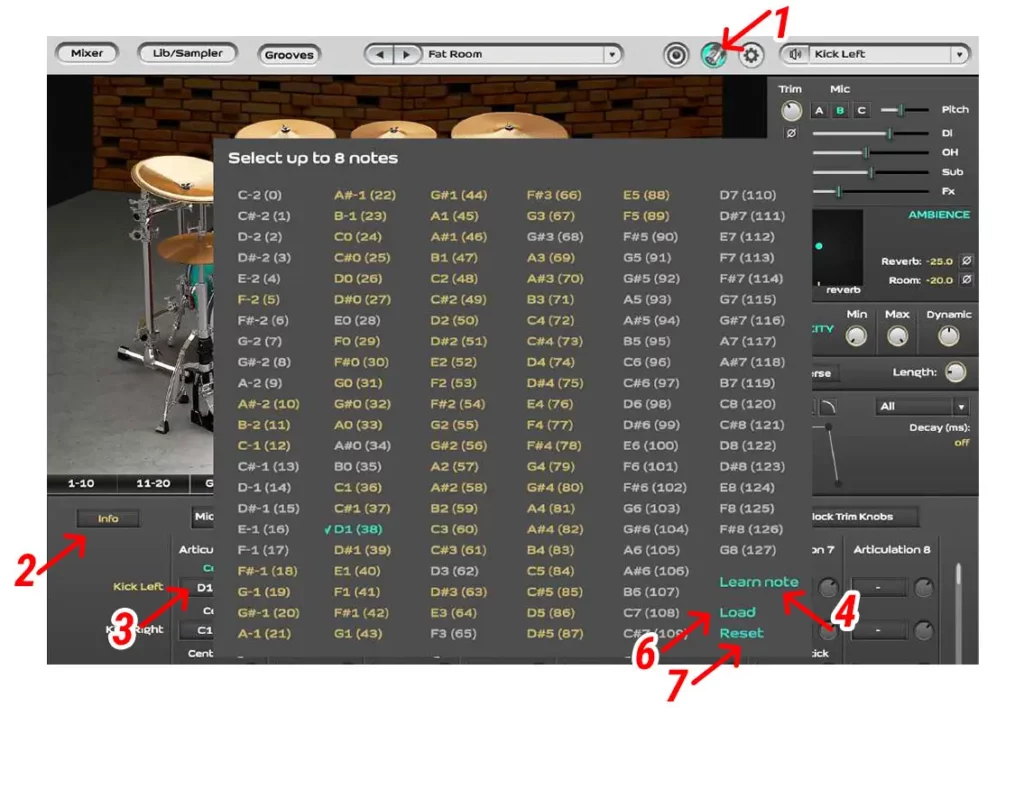
You can quickly customize your MIDI-map using the Learn Note function by following
the steps below (see Pic.4 for reference):

Pic. 4 MIDI-map customization
Hertz Drums supports various types of traditional and digital e-drum pads. For best experience we suggest using the following E-Snare articulations available on the MIDI page depending on the type of snare pad you’re using (See Pic.5 for reference):
| E-snare Articulation | Name | Default MIDI-note |
|---|---|---|
| Hertz Drums Articulation 1 | Zone 1 | C-1 |
| Hertz Drums Articulation 8 | Cross Stick | F-2 |
| E-snare Articulation | Name | Default MIDI-note |
|---|---|---|
| Hertz Drums Articulation 1 | Zone 1 | C-1 |
| Hertz Drums Articulation 3 | Rimshot Arts. | A#-2 |
| Hertz Drums Articulation 8 | Cross Stick | F-2 |
| E-snare Articulation | Name | Default MIDI-note |
|---|---|---|
| Hertz Drums Articulation 2 | Center Arts. | B-2 |
| Hertz Drums Articulation 3 | Rimshot Arts. | A#-2 |
| Hertz Drums Articulation 8 | Cross Stick | F-2 |

Pic. 5 E-snare articulations on the MIDI page
Just like with the snare, Hertz Drums supports various types of electronic Hi-Hat pads. Depending on the Hi-Hat pad type we suggest using the following E-HiHat articulations available on the MIDI page (See Pic.6 for reference):
| E-HiHat Articulation | Name | Default MIDI note |
|---|---|---|
| Hertz Drums Articulation 1 | Zone 1 Open-Close | G#-1 |
| Hertz Drums Articulation 8 | Pedal | G#1 |
| E-HiHat Articulation | Name | Default MIDI note |
|---|---|---|
| Hertz Drums Articulation 2 | Edge Open-Close | G-1 |
| Hertz Drums Articulation 3 | Tip Open-Close | F#-1 |
| Hertz Drums Articulation 8 | Pedal | G#1 |

Pic. 6 E-HiHat articulations on the MIDI page
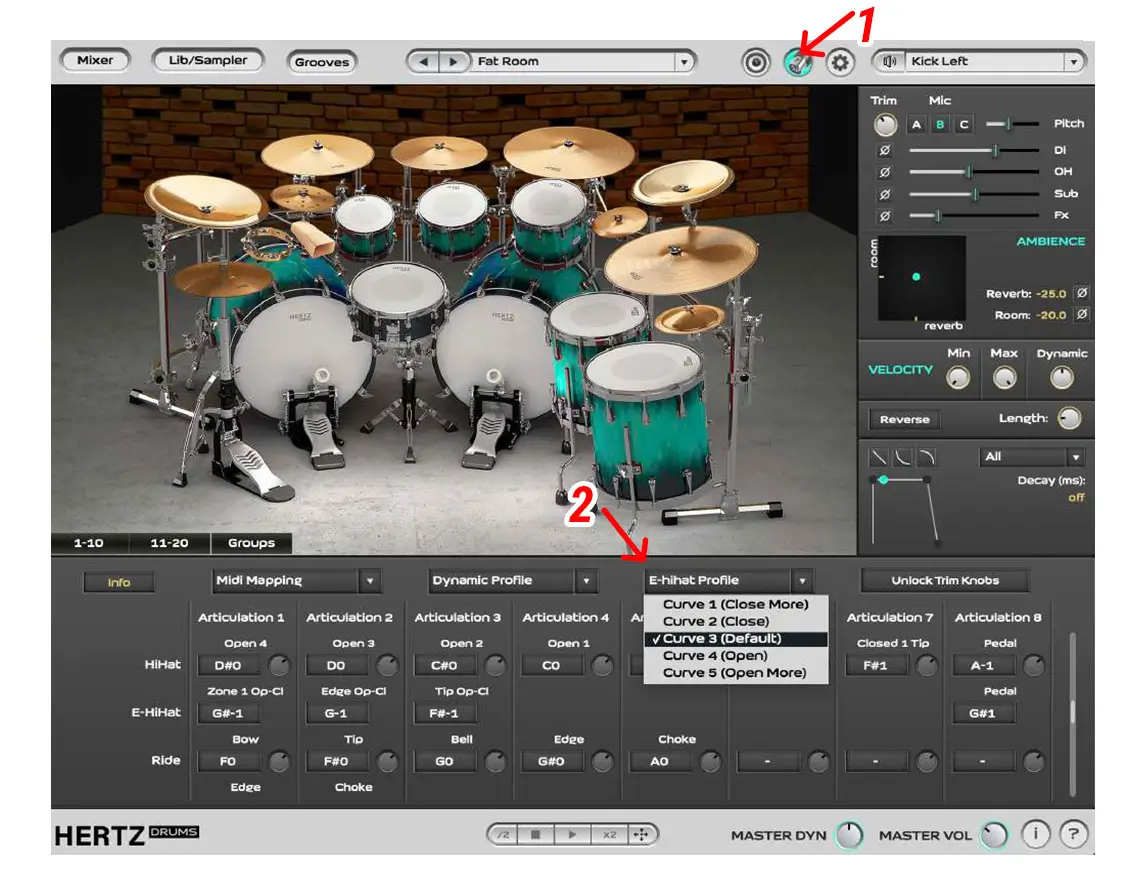
Hertz Drums allows you to choose one of the 5 calibration profiles for your E-HiHat pedal, which determines how much your E-HiHat opens.
To change the E-HiHat profile (See Pic.7 for reference):
For E-drum toms we suggest using the Articulation 3 (L/R) available on the MIDI page for every tom. When this articulation is played several times in a row, the plugin plays
the left and right hand samples alternately, which closely replicates the natural way of
playing tom fills and rolls.

Pic.7 Changing E-HiHat opening profile
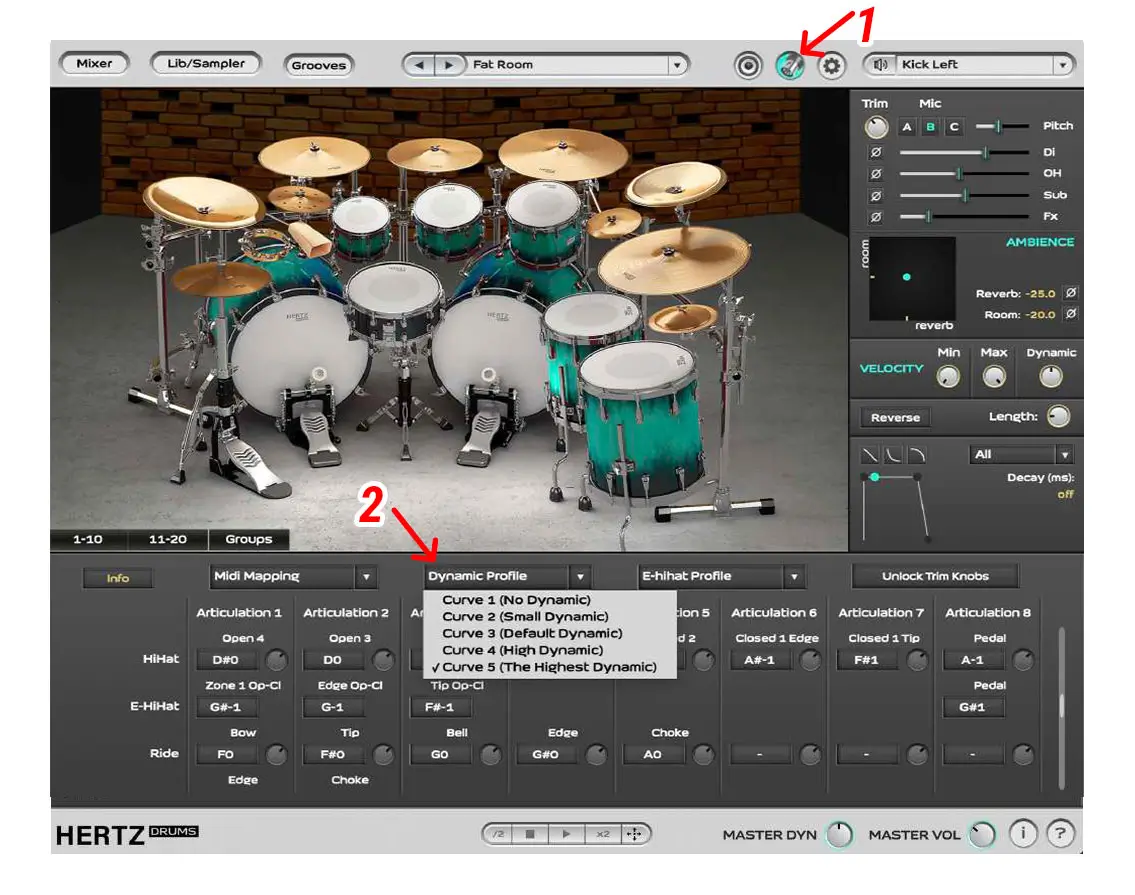
A Dynamic Profile in Hertz Drums determines to what extent the volume at which the samples are played by the plugin corresponds to the strength with which the drums are hit.
To access the list of available Dynamic Profiles (See Pic.8 for reference):
In this menu, Curve 1 sets up the dynamics in such a way that for light and hard strokes the plugin will play the light and hard hit samples correspondingly, but they will be played at the same volume.
Curve 3 is the default setting, which works best with Hertz Drums MIDI-grooves.
Curve 5 works best with most E-drums, ensuring the most realistic feel and sound.

Pic. 8 The Dynamic Profile menu
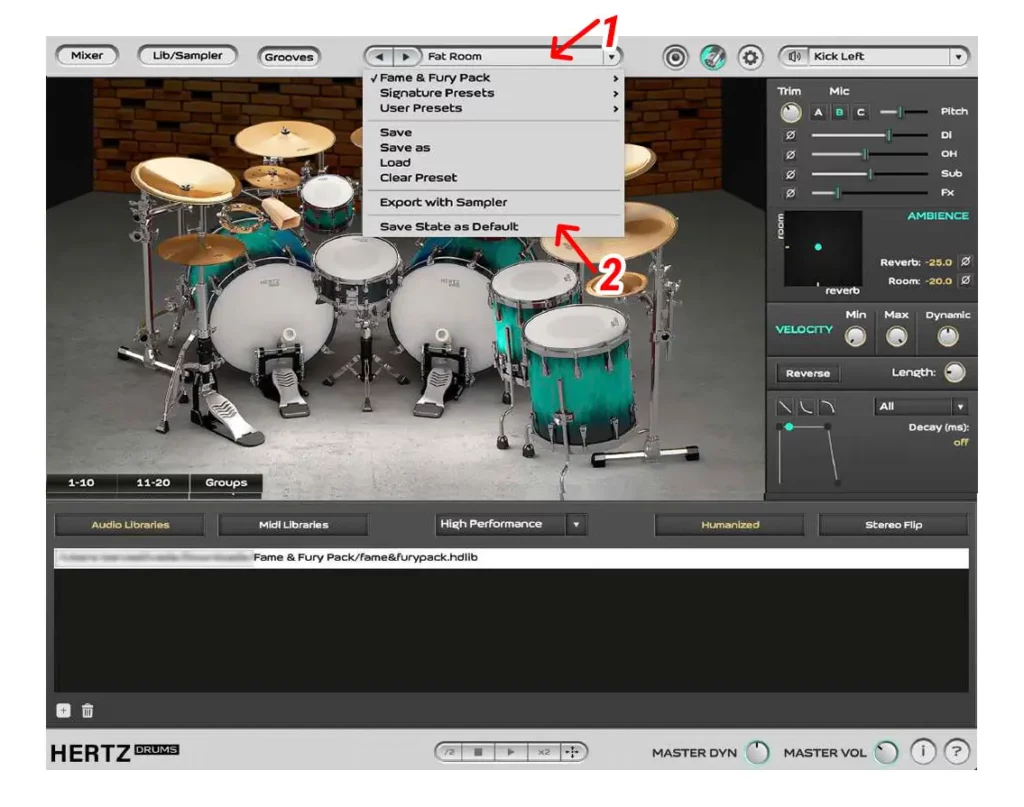
After you make any changes to the parameters, you can save this state of the plugin as the new Default State the plugin will be loading into.
To change the Default State of the plugin please follow the steps below (See Pic.9 for
reference):
Important: in case you run into any problems while setting up and using the plugin, please contact our tech support: [email protected]
To be able to use Hertz Drums to its full potential please read the full Hertz Drums Instruction Manual.

Pic. 9 Save State as Default
Subscribe to our newsletter to stay updated with the latest news from Hertz Instruments and enjoy a 10% discount on all products!
